How to Remove Backgrounds on Adobe Illustrator?
3 simple ways to remove background from a photo in Adobe Illustrator. Also learn to remove background within seconds on a simple online tool.

If your work entails vector graphics, you must have already tried using Adobe Illustrator. The software continues to be a preferred application for most digital art enthusiasts particularly among professionals in graphic design, animation, UX, multimedia, illustration and so on. However, navigating the application might not be as easy as it appears. To be able to work smoothly on Adobe could possibly take a bit of time but we are here to get you started. Go ahead with the read to learn how to remove background in Adobe Illustrator in three super convenient ways.
Remove Background on Adobe Illustrator Using Image Trace:
As a widely opted choice for removing background in Adobe Illustrator, Image tracing works by converting your everyday JPEG or PNG pictures into vector format. This implies that your images are now significantly sharper and wouldn’t get blurred out when zoomed in for editing.
How do we go about it?
Step 1: Once you open the application, click on the image that you would want to remove the background for. This is true for vector graphics as well, as you can select the vector object you wish to edit.
Step 2: When the image is now on your workspace, click on ‘Show Transparency Grid’ from the ‘View’ option. This would help you understand the transparency after the checkered background gets displayed.
Step 3: Select the ‘Window’ tab. A dropdown menu will appear from which you need to press ‘Image Trace’ and then proceed by clicking on the ‘Selection’ tool from the toolbar. Click on your image and select it.
Step 4: To ensure optimized results, opt for the ‘High Fidelity Photo’ from the Image Trace window. You might also want to choose from the other presets and moderate the settings as per your need or quality of your image. The ‘Mode’, however must be set to the ‘Color’ preset.
Step 5: Quickly convert your image into vector format by choosing ‘Expand’ from the ‘Object’ option.
Step 6: The white arrow in the toolbar is suggestive of the ‘Direct Selection’ tool. Click on it and select parts of the image background that you want to remove. Keep pressing ‘Delete’ for every part you would want to edit out.
Step 7: The last and final step is to export the file in the form of .PNG or EPS by selecting ‘Expand’ from the ‘Object’ tool. Do not miss to check off the Background transparent box. You can now go to ‘File’ and select ‘Save as’ to save your edited image.
Remove Background on Adobe Illustrator Using Pen Tool:
The Pen Tool can be a bit tricky for first-timers but once you get used to it, there’s no looking back for another option to remove background in Adobe Illustrator. For every image that you want to edit, the Pen tool uses the Clipping mask feature to help you pinpoint segments and create an outline of the image that needs to be edited out.
How do we go about it?
Step 1: Once you open the application and the image you want to remove the background for is placed on your screen, select the ‘Pen tool’ option in the toolbar.
Step 2: Press Z or directly use the ‘Zoom’ option from the toolbar to magnify the image. Zooming is absolutely necessary if you’d like your edit to be clearer. Meanwhile, choose your stroke color and make sure to click on the ‘No Fill’ option.
Step 3: It is time to draw your outline of the image. For this, you need to keep clicking around the image and creating anchor points. You can easily play along these dots (anchor points) now by creating straight lines or curves between each of them.
Step 4: When you are ready with the outline that you think might be accurate for your image, make sure to click on the first anchor point. This step will secure the shape. Remember that we are not seeking perfection. And so, you could always make necessary alterations if required.
Step 5: Press ‘Shift’ and click on both the images; the original unedited one and the image with your drawn outline.
Step 6: Select ‘Make Clipping Mask’ from the array of options that appear when you right-click on the mouse on the selected images. Congrats! You have been able to successfully remove background in Adobe Illustrator using Pen Tool.
Step 7: You might want to go ahead and check the transparency and then export the file in your desired format. The background transparent box must be always checked off!
Remove Background on Adobe Illustrator Using Magic Wand:
The image you want to remove background in Adobe Illustrator is already a vector image! Half your hassle is gone. The Magic wand, just like its name suggests magically helps in identifying elements that are in sync with the portion of the image you want to remove.
How do we go about it?
Step 1: Once your application is open and the image you want to remove the background from is uploaded on the workspace, go to the ‘Magic Wand’ option in the toolbar and specify the attributes (Fill Color, Stroke Color, Stroke weight, Opacity, etc.)
Step 2: After the specifications in the attributes are applied, the Magic wand automatically selects elements that align with your customizations.
Step 3: You can now click ‘Delete’ to remove the unwanted parts and keep repeating the process unless you are satisfied with the end result.
Easier Way: Background Remover by Magic Studio
Our guide definitely helped you explore multiple ways to remove background in Adobe Illustrator but what if we told you that you could easily remove background of your images more conveniently on Magic Studio. Look no further and follow the next steps for a smooth experience.
Step 1: Visit the Magic Studio website (No. You don’t need to register to use the site.)
Step 2: Click on the ‘Tools’ option from which you need to select ‘Background Remover’. A page opens that suggests you to upload the picture you would like to remove background from.

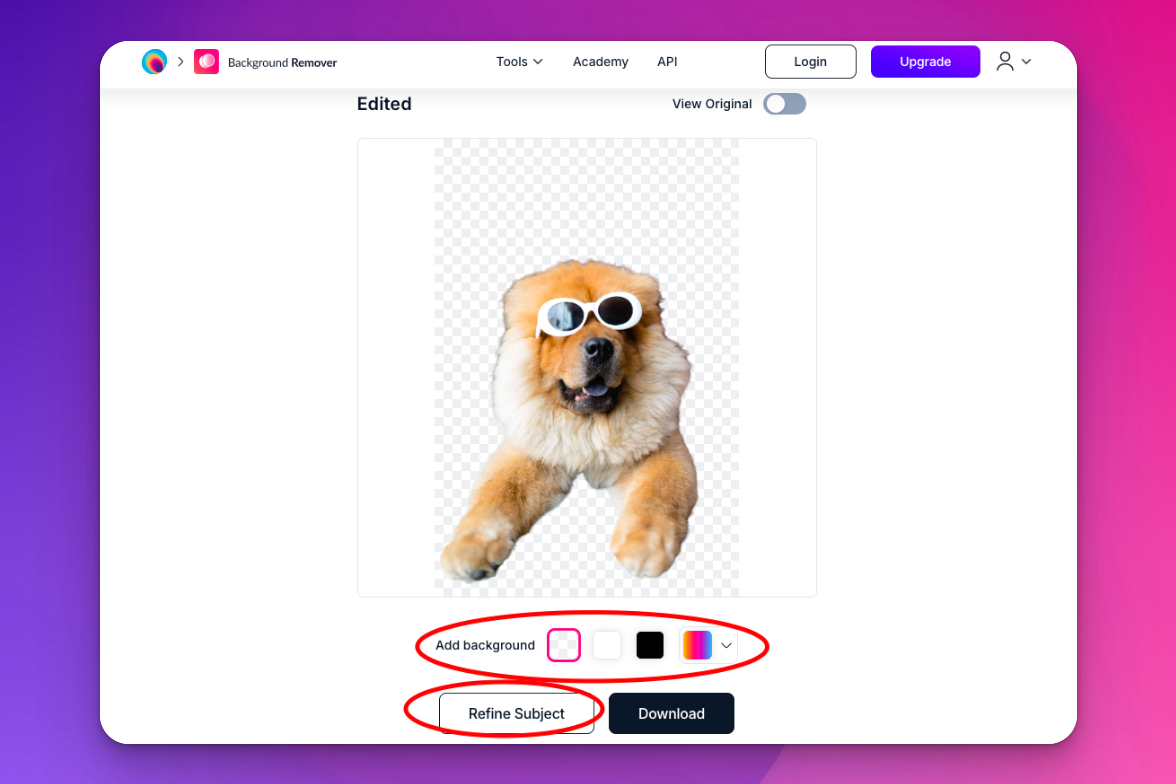
Step 3: Wait for a couple of seconds after the picture has been uploaded.
Step 4: Voila! Your background has been removed. You can proceed to select the new background color from the available customizations or just let it be. All that’s left is downloading the edited picture and you are good to go!
With our detailed guide, besides learning to remove background in Adobe Illustrator, you got to get introduced to the hassle-free application of Magic Studio. Not only does the latter save time but also makes it conveniently easier. Keep following us for more guides like these for we will always be there to upgrade your precision in digital art.