How to Remove a Background from a Picture in Google Slides?
Do you want to upgrade your Google slides by 10x with perfect visual effects? One of the ways to make your subject pop in Google Slides is by removing its background. In this article, we will tell you a quick and easy way to do this.


Do you want to upgrade your Google slides by 10x with perfect visual effects? One of the ways to make your subject pop in Google Slides is by removing its background. In this article, we will tell you a quick and easy way to do this.
Introduction
Visual representation plays a crucial role in driving your viewer's interest, further improving the effectiveness of your work. Exceptional visual representation comprises various components like strong text, to-the-point explanations, and, most important of all, smart image usage. Innovatively or aesthetically used images are known for attracting the viewer's eye in one go.
Thus, editing normal images and using them creatively in your presentations is highly important today. However, many of you may need help with doing so, especially when it comes to doing complex editing work like removing background from an image on Google Slides. Therefore, this article will show you how to remove the background from a picture in Google Slides.
How to Remove the Background of an Image in Google Slides?
Step 1: Open Google Slides
Go to your Google Slides presentation and make sure you are signed in to your Google account.
Step 2: Insert Image
Click on the slide where you want to add the image. Then, go to 'Insert' in the top menu and select 'Image.' This will allow you to choose the image you want to use.
Step 3: Select the Image
Now, click on the image you have inserted to select it. This will allow you to see the options oriented for making changes to it.
Step 4: Go to Format Options
Next, click 'Format' in the top menu, then choose 'Format Options.' A sidebar must appear on the right-hand side of your screen.
Step 5: Set Transparency
In the sidebar, go to 'Adjustments' and find the 'Transparency' or “Opacity” option. A slider will appear. Use this slider to adjust the transparency of the image. This will allow you to make the background of the image more transparent. Experiment until you like how it looks.
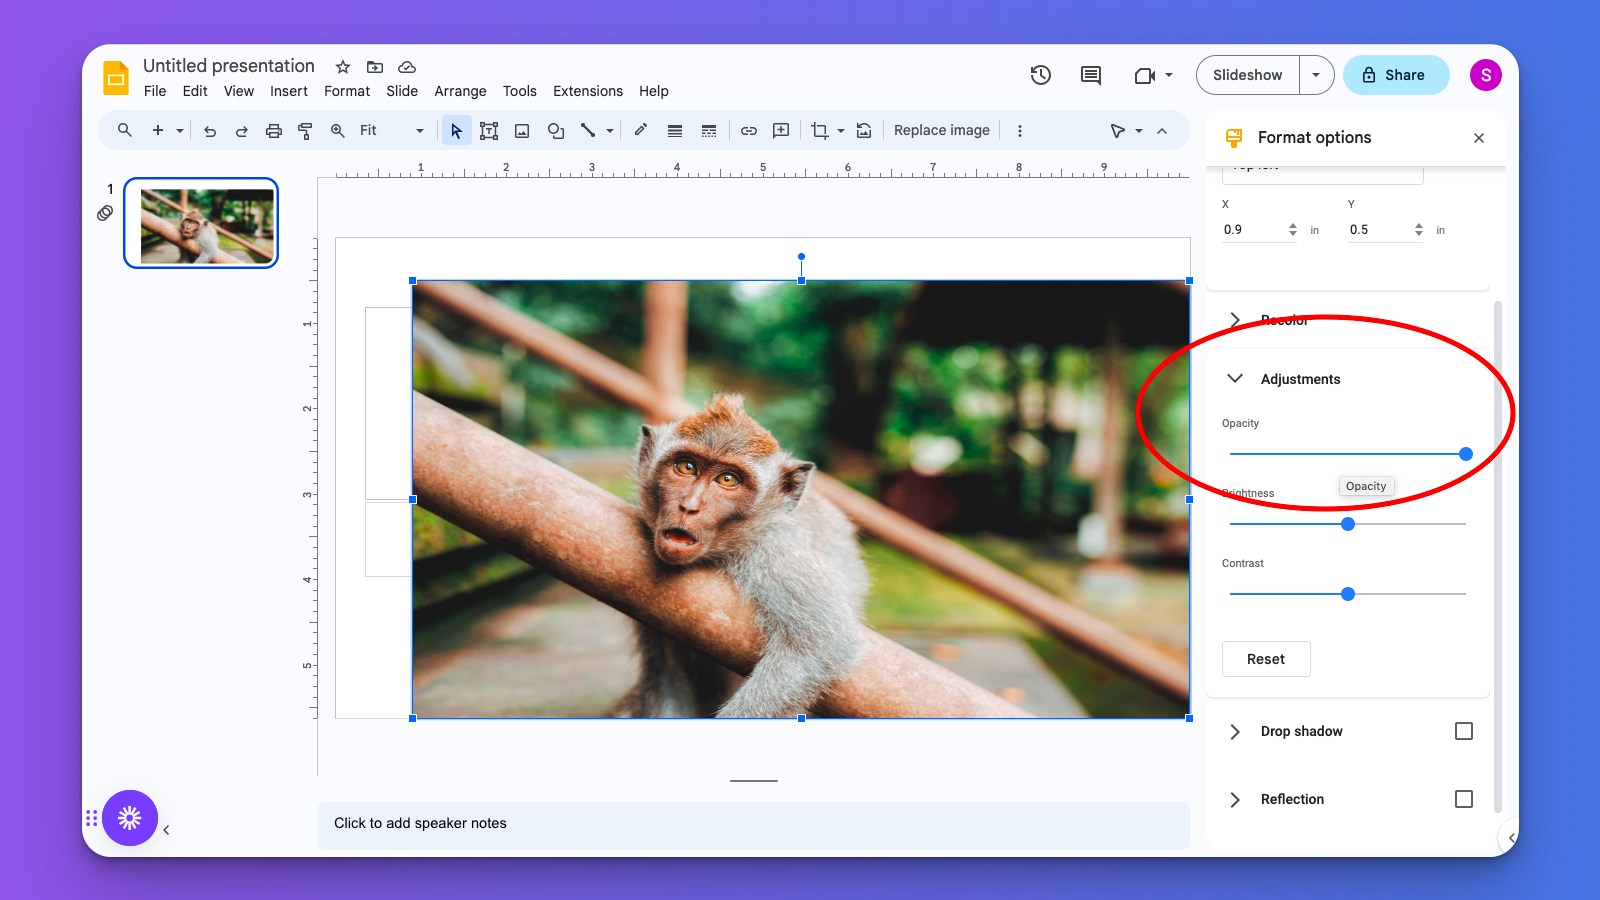
This way will impact the opacity of the whole image and will not exactly remove the background of the image.
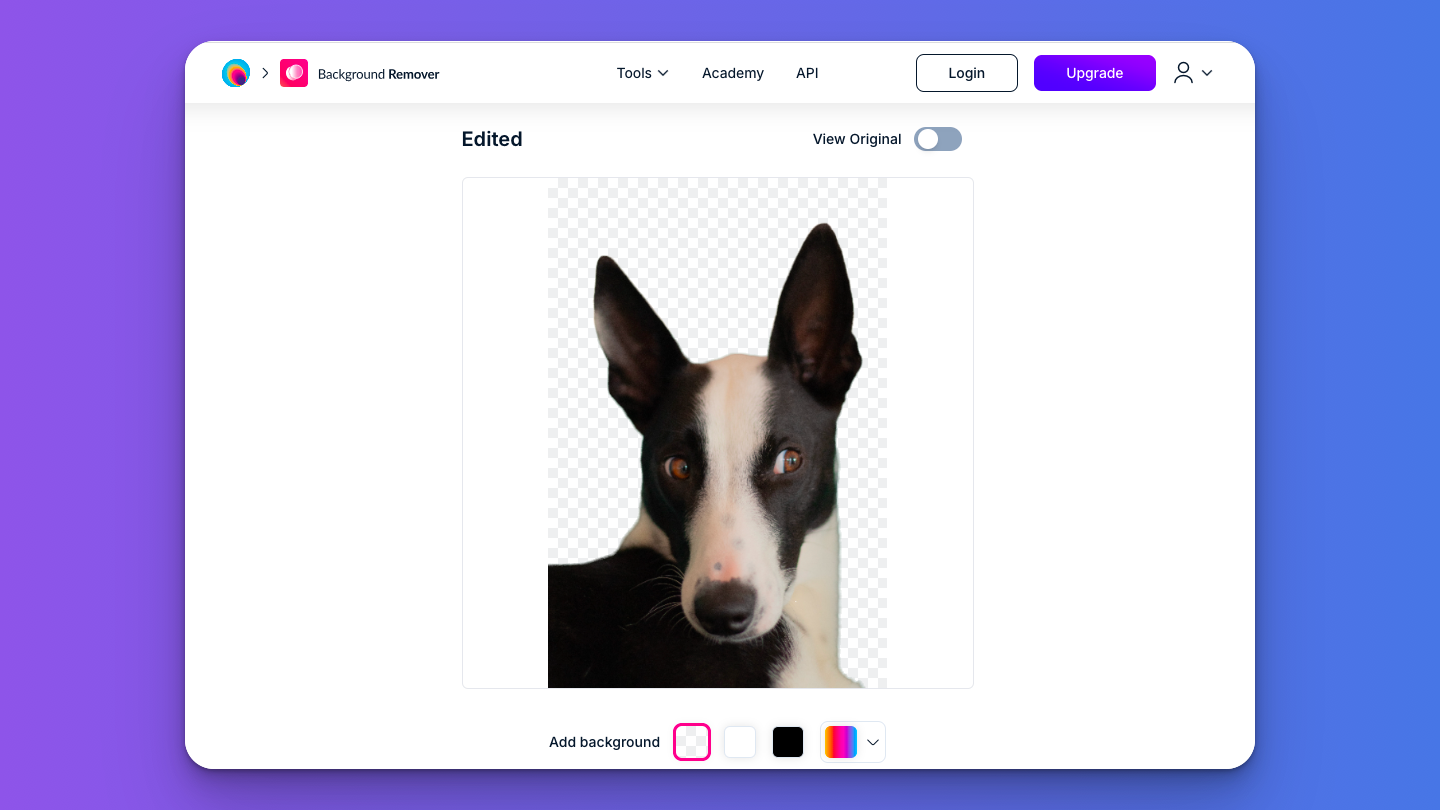
Step 6: Use an online tool to remove background and place it back on Google Slides
Thus, to remove the background, you need to take the help of an online background remover. This tool will remove the background, and once removed, you can upload the cut-out image back into the slide to get the desired result.
You can use the Magic Studio Background Remover for this purpose. Follow these steps to use it:
- Go to the website Magic Studio in your web browser.
- On the home page, you will find the option "Tools." Hover to this section, and a drop-down menu will open.
- Select the Magic Studio Background Remover.
- Now, you will see a box saying “Drag or Drop” and a button “Upload Image.”
- After uploading your image, Magic Studio will process it. This might take less than 5 seconds to remove the background of the image.
That’s all! So, avoid the hassle of manually editing tools and use Magic Studio instead. It also has various other functions, allowing you to get hold of the image you desire.
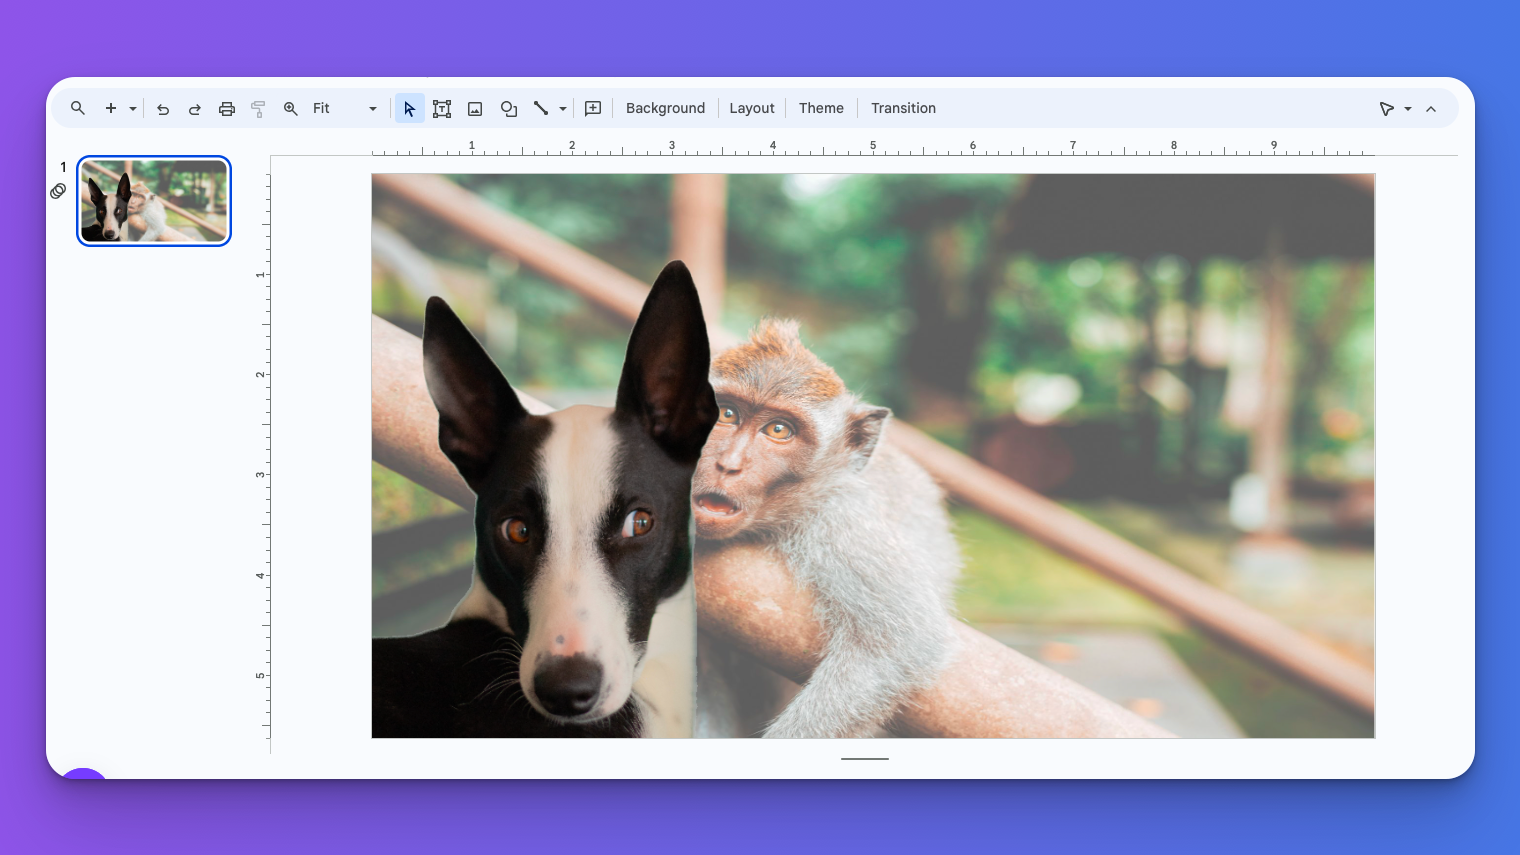
Step 7: Upload and Scale the Image
After removing the background, you can paste the image back to the slide. Click on the image and drag its corners to adjust as needed.
Step 8: Position the Image
You can also use the up and down arrows to change the image's position on the slide. Now, click 'Present' at the top to preview how the image looks.
Step 9: Send to Back
Now, with the image selected, right-click it and choose 'Order.' You must be able to see an option called 'Send to back.' Click on it if you wish to ensure the image becomes the background of your slide.
Step 10: Apply to All Slides (Optional)
If you want the transparent image as the background for all slides, right-click the image and select 'Theme.' However, in case you only want it on blank slides, choose 'Blank.'
Step 11: Save and Edit
Your image must now be the transparent background of your slide. Also, do not forget to save your work.
That is it! You've successfully removed the background from your image in Google Slides using the Magic Studio Background Remover tool. It is a quick and easy way to make your presentations look even better.