How to Remove Background From a Picture in PowerPoint?
Do you want to remove the background from PowerPoint but have no idea how to remove it? This article will teach you that in under 2 minutes!


Whether you're presenting at a conference or in a boardroom, a powerful presentation can go a long way. But do you know what creates a presentation worth remembering? The visuals! Visual elements in a presentation serve as the emotional conduits to the audience. The age-old saying that a picture is worth a thousand words stands corrected in this situation. Images can evoke emotions that words alone generally cannot. They can provide you with a means to establish a deeper, more tangible connection with your audience as you present your PowerPoint presentation.
However, sometimes you may find the perfect image for your presentation, but the background is not really right. It may be too distracting or not going with the theme. Sometimes you may even want your subject to pop and be surrounded by text or another subject that suits the idea you are trying to convey.
So, what should you do in a situation like this? Well, there is a background-removing tool that you can use. If you are curious to know more about this tool and how to remove background from a picture in PowerPoint by using this tool, stay tuned till the end.
Why Should You Remove the Background of an Image?
Look at the image below for a Powerpoint cover image.

Now compare that with the following image:

Do you see how removing the background made the same image far more impactful and clear in messaging? Now let’s look at some of the benefits that can be achieved by removing the image background in PowerPoint:
1. Enhancing Visual Appeal
When you remove the background from an image, you can make the main subject stand out more effectively. This can enhance the overall visual appeal of your presentation by eliminating distractions and focusing the audience's attention where it matters most. This also conveys your messaging in a far more crisp and effective manner.
2. Creating Professional-Looking Slides
Removing the background allows you to create professional-looking slides. It's a common practice in business presentations where you want to maintain a clean, consistent look throughout your deck.
3. Better Integration of Colour Themes
When you remove the background, the image can seamlessly blend into the background color or style of your presentation. This ensures a cohesive and harmonious look.
Preparing Your Image for Background Removal
Removing a background from an image can be more effective if you start with the right picture and prepare it appropriately. Here are three steps and useful tips to get your image ready:
Step 1: Choose the Right Image
- Opt for High-Resolution Images: High-resolution images contain more detail, making it easier to distinguish the subject from the background during removal.
Don’t worry if the image you selected is not of the best quality; check out this video to improve the image quality in PowerPoint in just 2 minutes!
- Ensure Clear Subject-Background Contrast: Images with a distinct contrast between the subject and background are ideal. This helps automatic removal tools work more effectively.
Step 2: Isolate the Subject
- Crop Your Image: Use photo editing software to crop your image and focus on the subject. Removing excess background can simplify the removal process. If you don’t know how to crop an image in PowerPoint, check out the video below.
- Use a Solid Background: If possible, place your subject against a solid-colored background. This makes it easier to separate the subject from the background.
Step 3: Clean Up the Subject
- Refine Edges: Before removal, touch up the edges of your subject. Clear, well-defined edges make the removal process smoother.
- Remove Unwanted Elements: If there are any unwanted objects or distractions in the image, consider removing or retouching them.
How to Remove Background from a Picture in PowerPoint?
To remove the background from a picture in PowerPoint, follow these steps:
Step 1: Insert Your Image
- Open your PowerPoint presentation.
- Click on the slide where you want to add the image.
- Go to the "Insert" tab in the PowerPoint ribbon.
- Click on "Pictures" to select the image you want to use.
- You can even open and just drag and drop any image from your desktop too.
Step 2: Select the Picture
- Once the image is inserted, select it by clicking on it.
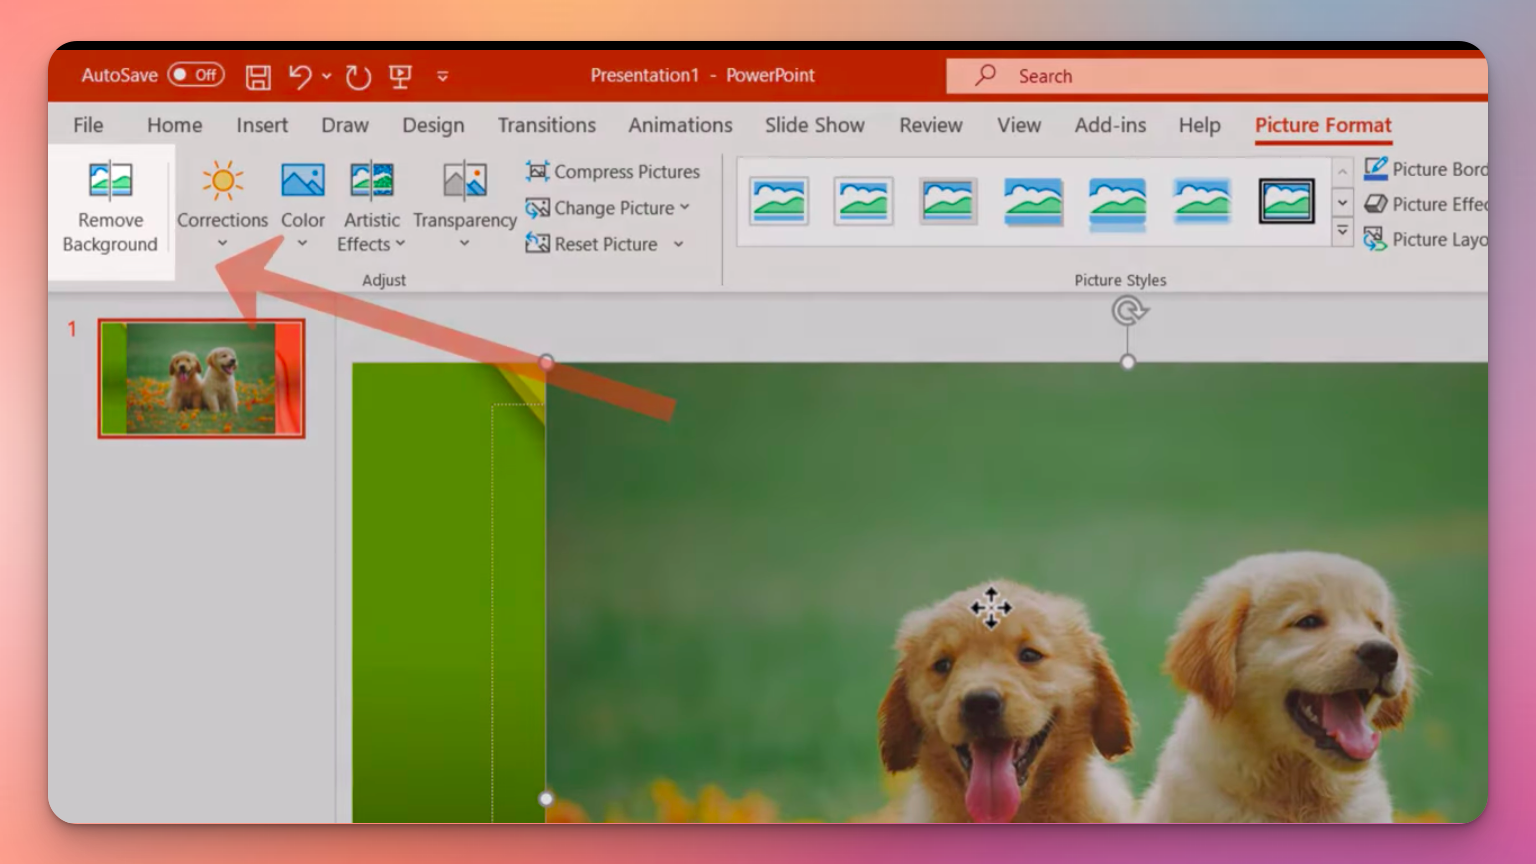
Step 3: Open the Remove Background Tool
- After selecting the image, you'll notice the "Picture Format" tab appearing on the ribbon.
- Click on this tab to reveal additional options.
- In the "Adjust" group, you'll find the "Remove Background" button. Click on it.
Step 4: Mark Areas to Keep or Remove
- The Remove Background tool will now display a selection with a pink overlay on your image. This is the suggested removal by PowerPoint.
- PowerPoint will automatically try to determine the background and foreground areas.
- You can further refine the selection by marking areas to "Keep" or "Remove." Simply click and drag over the areas you want to keep or remove.
- PowerPoint will adjust the selection accordingly.
Step 5: Finalize Your Selection
- Once you are satisfied with the selection, click "Keep Changes."
Step 6: Save Your Image
- The background of your image will be removed, leaving only the subject.
- You can now save your edited image as a separate file or use it in your PowerPoint presentation.
What to Do When the Remove Background Tool Doesn't Work?
Sometimes, the built-in Remove Background tool in PowerPoint may not deliver the desired results. This can happen when you have low-resolution images, unclear subject-background contrast, or intricate details such as hair or fine edges. In such cases, you can turn to external tools like Magic Studio for more accurate background removal.
Using Magic Studio for Background Removal
Magic Studio is an online tool that specializes in removing backgrounds from images with precision. Here's how to use it:

Open your web browser or mobile web and go to the Magic Studio website.
2. Access the "Tools" Menu
At the top of the Magic Studio interface, you'll see a "Tools" option. Click on it, and a drop-down menu will appear.
3. Select "Background Remover"
From the drop-down menu, choose "Background Remover."
4. Upload Your Picture
On the Background Remover page, you will find an option to "Upload picture." Click on it and select the image you want to edit.
5. Watch the Magic Happen
Now, select the option"Upload Picture," and the background of the image will be removed. The tool works its wonders quickly and efficiently.
6. Customize Your Background
Magic Studio offers a variety of background color options for you to choose from. This allows you to replace the removed background with a color that suits your presentation's theme. You can even opt for a transparent background if needed.
Conclusion
Removing the background from an image in PowerPoint can take your presentations up a notch. While PowerPoint's built-in Remove Background tool is a handy feature for enhancing your presentations, it does have its limitations, such as requiring a high-resolution image and a clearly defined background or foreground.
This is where Magic Studio Background Remover comes to the rescue. Unlike PowerPoint's tool, Magic Studio offers the advantage of no resolution limitations on uploaded images. What's more, you don't need any special skills or experience – just upload your image and get started. And it's not just about background removal, Magic Studio provides numerous other tools like Magic Eraser and Background Blur, all available for free. So, check out all of them now!